Thursday, October 31, 2013

Bugs and Kisses Gift Tags and Treat Bag - a Free Halloween Printable


Here's a fun idea for Halloween and I have the free print out for you.  Fill treat bags with Hershey's kisses, then add a few plastic bugs.  Attach the printable "Happy Halloween with bugs and kisses".  It's that easy. 

But if you are looking for more, 
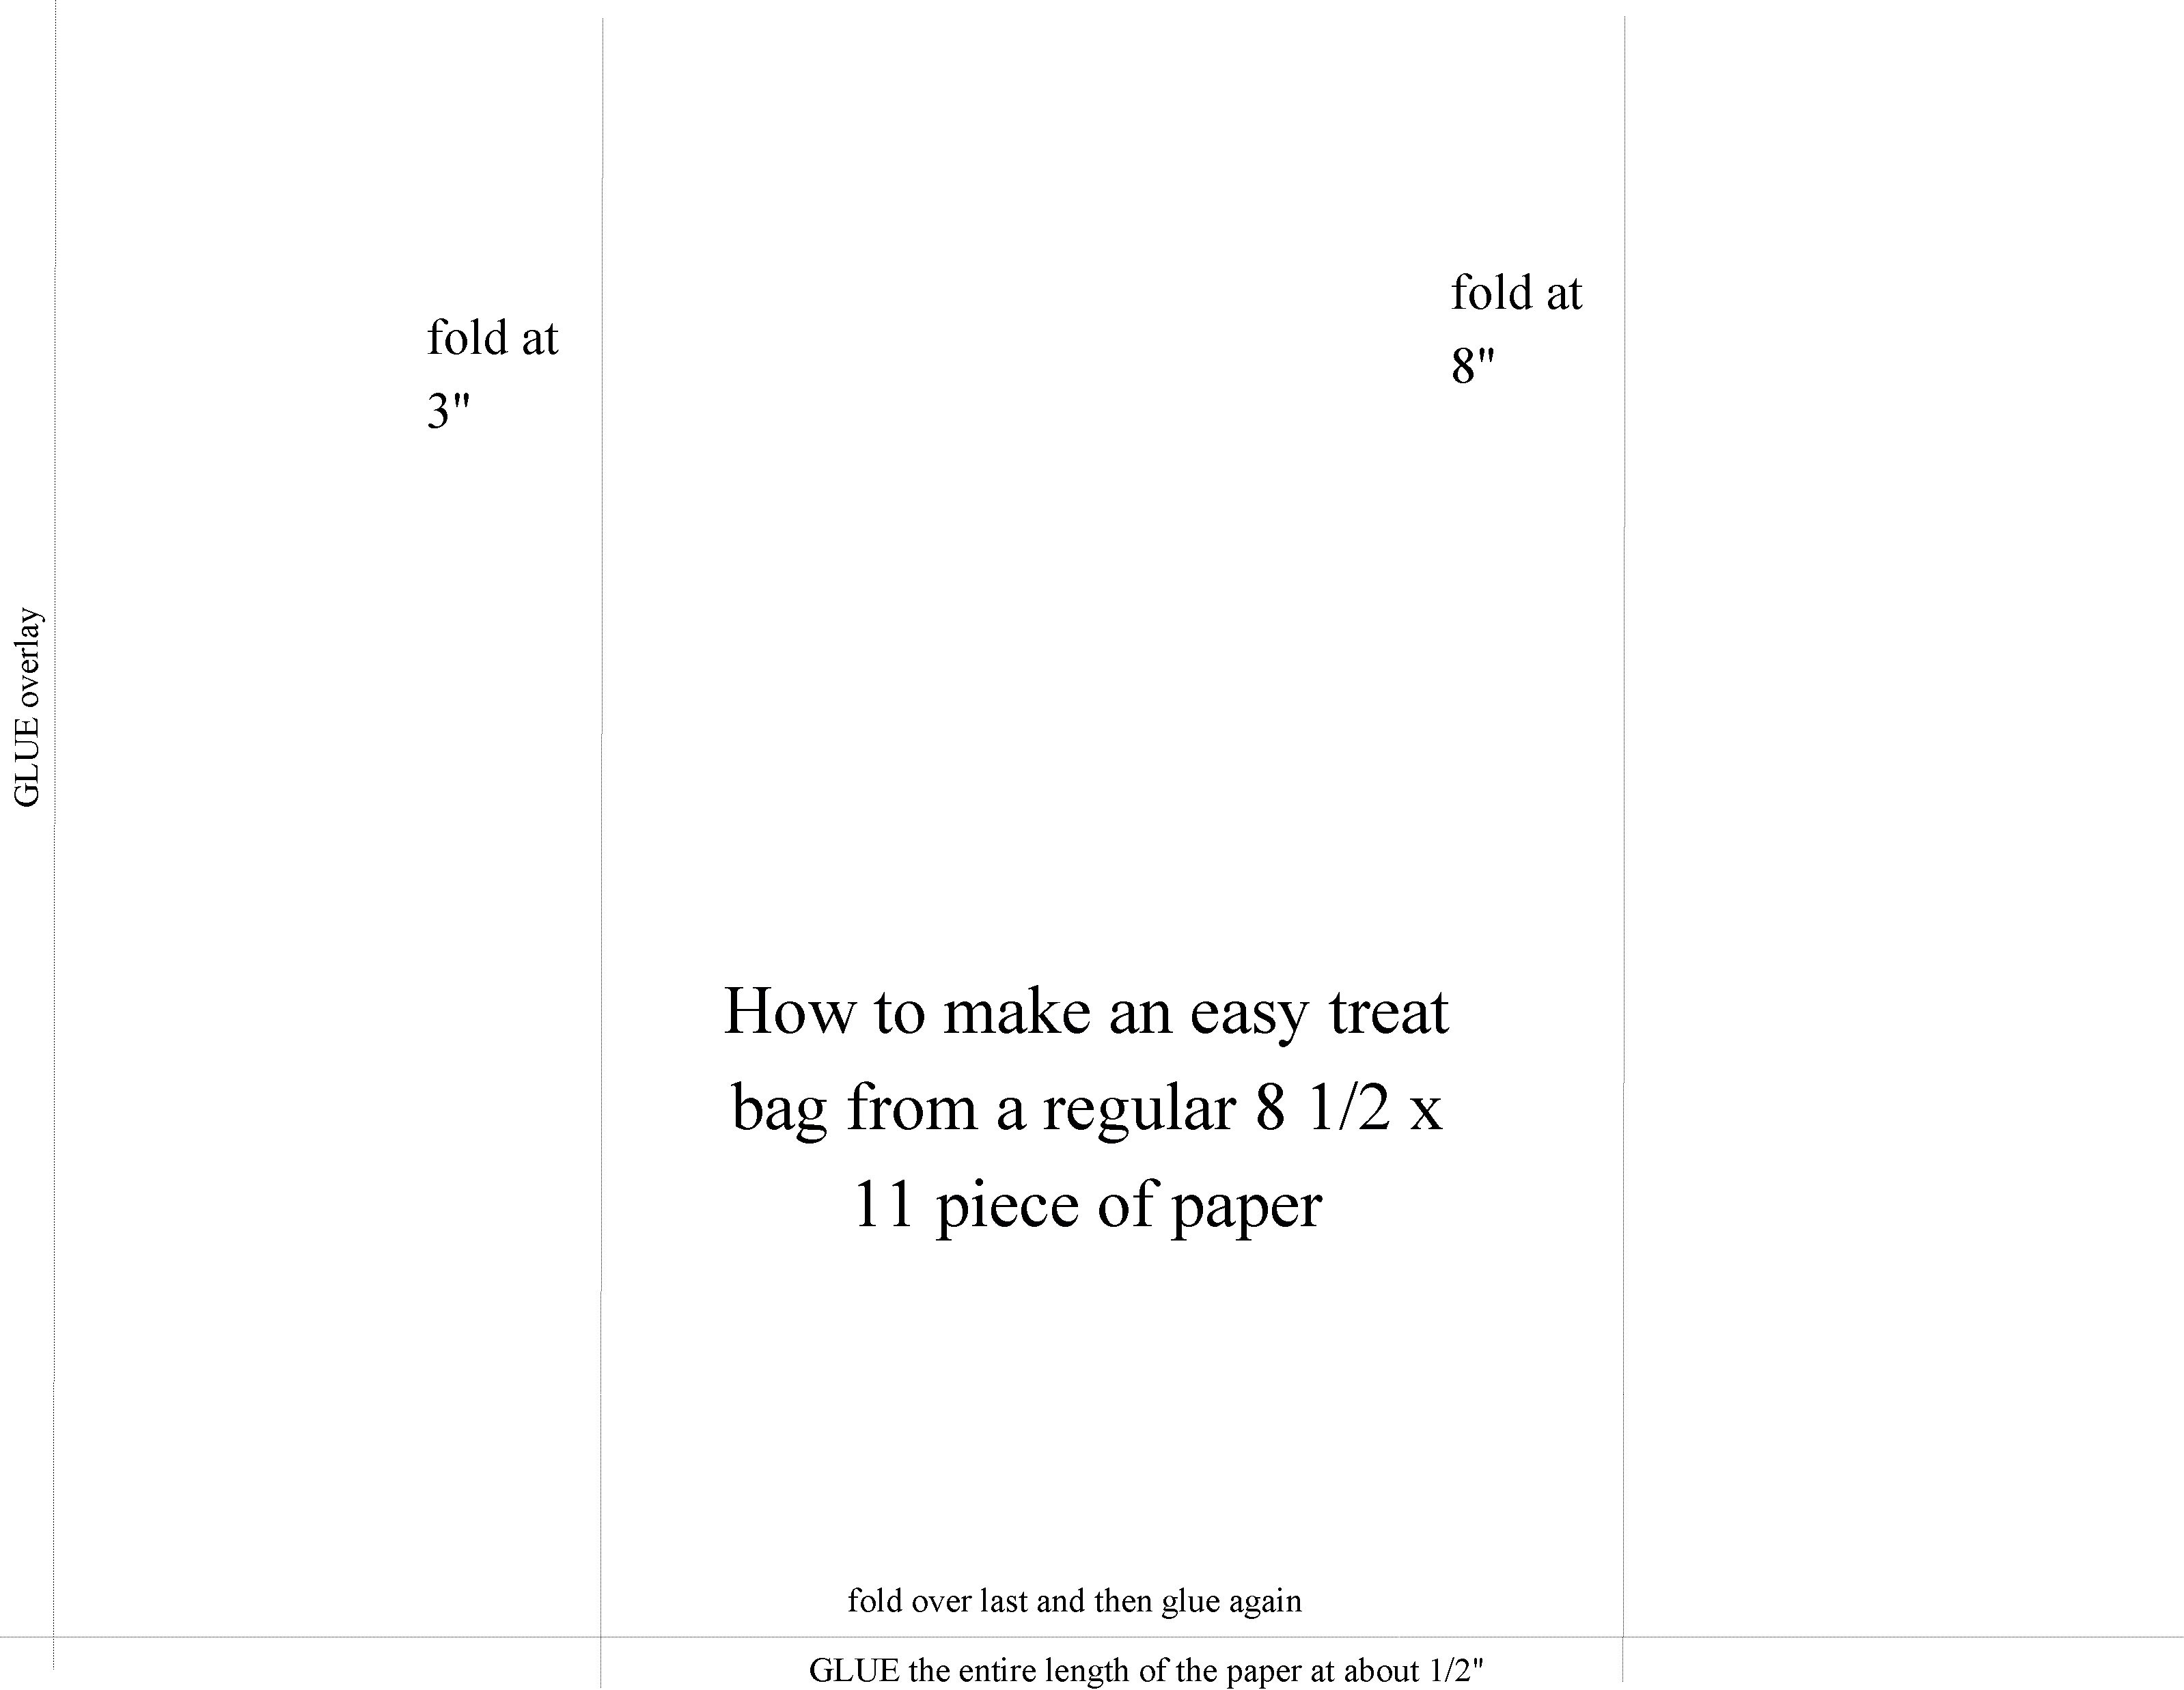
I also have a printable Halloween Treat Bag that matches.


Above is the treat bag printed in cardstock.


I found these cute Halloween bags, 
and attached the trick-or-treat ribbon.  
Then I attached the bugs and kisses printable. 
They turned out great.  
They were a big hit with all of our friends.


Gift Tag Printable:

Here's the printable for you.  
Just click on the picture to make it larger,
 then right click and "save as" or "copy".  
Use it in your favorite word program.  
You can size it to the size that you need.

Using colored paper or cardstock makes it so much more fun.
My favorite is a parchment color, but you could use anything.


Treat Bag Printable:
 
Using colored paper or cardstock makes it so much more fun.
My favorite is a parchment color, but you could use anything.


Here are the instructions on how to fold the treat bags.  
Here's another version that you might like:


I have created another version that is a cellophane bag topper that is really cute.  
You can get the printout by clicking here.


Happy Halloween!

I have to give a shout out to the original idea from:

 http://momsbyheart.net/free-printable-of-the-day-177/
I loved her idea, but I wanted my printable to be a little more vintage looking.  If you like a more modern look visit mom's by heart to get her free printable.

http://hollyshome-hollyshome.blogspot.com/p/fun.html

And for more of Hollys Home Halloween ideas just go here

Thursday, October 10, 2013

Making Family Shirts With Iron On T-Shirt Transfer


Our family was planning a trip to Disneyland.  At the last minute I wanted to get us all matching T-Shirts, but it was too late to have any made.  I have done iron on transfers before but I wasn't sure I wanted to do them again.  I really had no choice if I wanted matching shirts.
Sooooo, I started with the internet and found this wonderful site called Font Space that had so many cool fonts.  They had a selection of Disney fonts that I could use.  Here is the site:
So with my new fonts available to me I went to work.  I used the Walter font, with one of the Mickey Mouse Ears font.  I found a Jack Skellington on the Web, and the pumpkin from my Print Shop Program.  I used my Print Shop Program to put it all together.  Here is what I came up with. 
I managed to get 2 iron on logos per page, plus a logo for the sleeve.  I printed them on Jolees Easy Image transfer paper for dark fabrics.  I tried it first on Avery's and it was a nightmare.  The paper would not come off.  I have not had luck with any of Avery's products.
BE SURE TO PRINT THEM OUT WITHOUT REVERSING THE PATTERN.   Then I hand cut around the logo, then peeled off the back. 
I laid the transfer where I wanted it on the shirt and placed parchment paper over the top.  I have the old fashioned iron that gets really hot, so it didn't take much time at all.   Then I ironed it on.  I also put a transfer onto the sleeve.
Here's an example of the shirt and the sleeve:
On one of the shirts I had ironed it a little too long.  It gave the transfer kind of a worn look, which I really liked.  I went back and did it to all the shirts. 
 Here is how it turned out:
I have since washed and dried the shirts without a problem.  If you really want them to last, you probably shouldn't dry them in the dryer. 

The shirts were a lot of fun to wear.  Here is the gang with our matching shirts:

For Christmas I made some more shirts for my family.  I did basically the same things, but changed it to Christmas.  I think it turned out cute.  Here it is:


 A few years ago my family and I decorated T-Shirts with bleach.  If you would like to see how to do it check it out by clicking on the picture below.


Monday, October 7, 2013

Halloween Treat Bag Pattern and Tutorial With Free Printables


Here is an easy way to make a treat bag that can be used for ANY occasion. 

 Here's how to do it:


First print out your picture in the middle of the page of paper.  You can use whatever color paper that you think would look the best for your graphic.


2. Turn the paper over to the back side.  Mark it at 3" and at 8".  Then put a line of glue across the bottom of the paper.

3.  Fold the paper at 3" and then again at 8". 

4. Put a line of glue where the two papers overlap on the back seam and put another line of glue across the bottom of the bag.

5.  Fold over the bottom of the bag about 1/2",  making sure that there is enough glue to secure it shut.

6.  Use a fancy pair of scissors to cut off the top of the bag.  I used pinking shears, but you can use anything.  You can even omit this step.

Now fill your bag with treats.  I hope you have a fun party.  Let me know how yours turned out.n


Here are some Halloween designs for your treat bags.

 First click on the picture for a larger version. 
Then just right click, save them as a picture. 
Size them to a full sheet of paper then print them out.

Use colored paper for an extra pop of color!


You can also fold over the top of the bag and punch two holes.  
Then string a ribbon through the holes and tie in a bow 
like the Thanksgiving bags below.


http://hollyshome-hollyshome.blogspot.com/2013/11/thanksgiving-treat-bag-printable.html
 
 
Thank you for visiting Holly's Home.

Feel free to leave a comment and let me know how your treat bag turned out!!